My original image was dark and low contrast. Had it been too light, I would have adjusted the left input slider. This would darken everything below that level. In fact everything below that level becomes black.
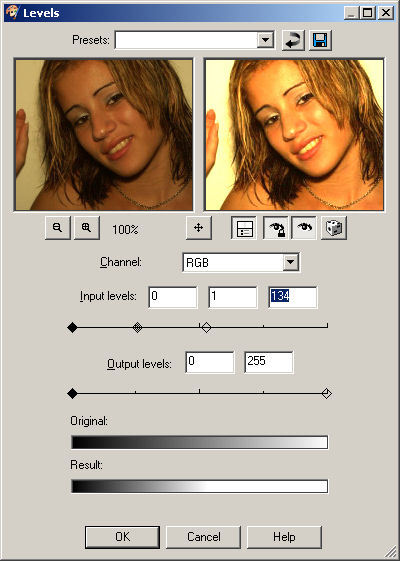
The preview window shows the result of your manipulations
However, I wanted to lighten the image of Michelle. To do so, I used the right input slider. This makes everything above that level white. I messed around until I found what I liked, something rather high key.
Adjusting the middle slider changes the gamma value. After a bit if experimentation, I decided to leave it as it was.
Note the “Original” and “Result” bars. The second one shows how there is a whole lot more white in the image now.
My final image far from perfect, but it’s a big improvement over the rather drab original.
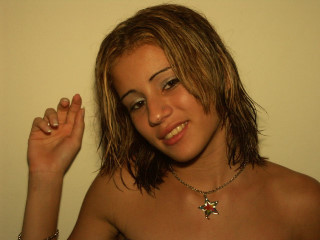
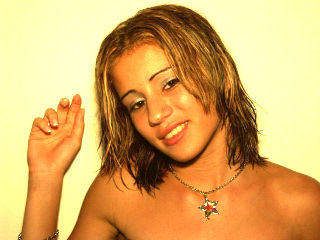
Before and after images